
In this article: A room-by-room planning guide to building a home theater — covering room sizing, screen placement, seating layout, risers, acoustics, lighting, and wiring, with Canadian-specific considerations throughout.
- Choosing and Sizing the Right Room
- Screen Size, Display Type, and Projector Placement
- Seating Layout and Row Configuration
- Building a Home Theater Riser
- Acoustic Treatment and Sound Control
- Lighting, Wiring, and Finishing
- Frequently Asked Questions
A home theater build has a strict order of operations. Room dimensions determine seating capacity. Seating capacity determines row depth. Row depth determines whether you need a riser. The riser determines your ceiling-height requirements. Every decision downstream depends on the decisions you make at the start. This guide walks through each stage in sequence so nothing gets planned in the wrong order.

Whether you are finishing a basement or converting a dedicated room on the main floor, the same planning principles apply. The specifics — humidity management, insulation, above-grade light control — differ by location, but the sequence stays the same.
Quick Takeaways
• Room dimensions set every other decision.
Minimum 10×14 ft for a single row; 12×22 ft minimum for two rows with a riser. Measure actual usable space, not nominal room size.
• Front-row distance matters more than screen size.
Position the front row at 1.0–1.5× the screen width from the display surface. Going wider than 1.5× trades immersion for comfort.
• Riser height is determined by your seats, not personal preference.
The back-row eye level must clear the front-row headrest by at least 6 inches. Measure your chosen seat height before building the riser platform.
• Acoustic treatment is structural, not decorative.
First-reflection panels, bass traps, and rear-wall absorption all need to be placed correctly to eliminate echo and frequency buildup. Position matters as much as quantity.
• Run all wiring before the walls close.
HDMI conduit, speaker wire, power circuits to seating, low-voltage step lighting — every one of these becomes a far more expensive job after drywall is up.
1. Choosing and Sizing the Right Room

A rectangular room is the correct starting point. L-shaped rooms, rooms with structural columns, open-plan spaces, and rooms that share a wall with HVAC equipment all add complexity without any compensating benefit. If you have a choice, pick the most box-shaped room available.
Minimum Usable Dimensions
| Setup Type | Minimum Room Size | Comfortable Room Size | Notes |
|---|---|---|---|
| Single row, tight | 10 × 14 ft | 10 × 16 ft | Works with a 100–110" screen at correct throw distance |
| Single row, comfortable | 12 × 18 ft | 13 × 20 ft | Allows side clearance, acoustic panel placement |
| Two rows, flat floor | 12 × 22 ft | 14 × 24 ft | Rear-row sightlines are compromised without a riser |
| Two rows with riser | 12 × 24 ft | 14 × 26 ft | Rear riser adds 4–6 ft to minimum depth requirement |
Ceiling Height
• 8 ft: workable for a single-row setup; risers become difficult or impossible.
• 9 ft: the standard recommendation; accommodates an 8–10 inch riser without the ceiling feeling oppressive.
• 10 ft and above: the target for two-row builds; gives full riser height plus comfortable headroom on the back platform.
Basement vs. Above-Grade Rooms
Canadian basements are the most common location for dedicated home theaters, and for good reason. Below-grade construction provides natural sound isolation from the main living area, structural walls that absorb low-frequency energy more effectively than lightweight framing, and complete light control from all directions. The trade-off is humidity management. Maintain interior relative humidity between 45–55% year-round to protect Italian Nappa leather upholstery and AV electronics. A dedicated dehumidifier with a floor drain is strongly recommended in any below-grade theater room.
Above-grade rooms require more aggressive light management — blackout cellular shades or custom blackout curtains on all windows, and careful attention to door light leaks at the threshold. The structural isolation benefit is absent, which means soundproofing requires additional investment in decoupled walls (staggered stud or double-stud construction).
2. Screen Size, Display Type, and Projector Placement

The display decision and the seating placement decision are made together — you cannot finalize one without the other. Screen size determines optimal viewing distance. Viewing distance determines where the front row goes. Front-row placement determines the remaining depth available for a second row.
Projector vs. Large-Format TV
• Projectors with fixed-frame screens: recommended at 100 inches diagonal and above. A 120" projection setup costs significantly less than a 120" display panel and delivers a more authentic cinema-scale experience in a properly darkened room.
• Large-format TVs (85–98 inches): suited to rooms where full light control is not achievable, or where the theater doubles as a family room. No bulb replacement, better black levels in mixed-use environments.
• The break-even point is roughly 100–110 inches. Below that, a TV is usually more practical. Above that, projection is usually more cost-effective.
Screen Height and Viewing Distance
| Screen Size (diagonal) | Screen Width (approx.) | Immersive Distance (1.0×) | Comfortable Distance (1.5×) |
|---|---|---|---|
| 100" | 87 in (7.3 ft) | 87 in (7.3 ft) | 131 in (10.9 ft) |
| 110" | 96 in (8.0 ft) | 96 in (8.0 ft) | 144 in (12.0 ft) |
| 120" | 105 in (8.75 ft) | 105 in (8.75 ft) | 157 in (13.1 ft) |
| 135" | 118 in (9.8 ft) | 118 in (9.8 ft) | 177 in (14.75 ft) |
Screen center height: position the vertical center of the screen at approximately 42–48 inches from the finished floor. This aligns with the natural eye level of a reclined theater seat and minimizes neck angle during extended viewing.
Projector Throw Distance
Standard-throw projectors (throw ratio 1.5:1 to 2.1:1) require 10–18 feet of distance to fill a 120" screen and are ceiling-mounted behind the seating. Short-throw projectors (under 0.6:1) sit close to the screen and eliminate ceiling mounting constraints entirely, at higher cost. Determine your throw ratio and ceiling mount position before any electrical rough-in work begins — the projector power and HDMI conduit both terminate at that mount location.
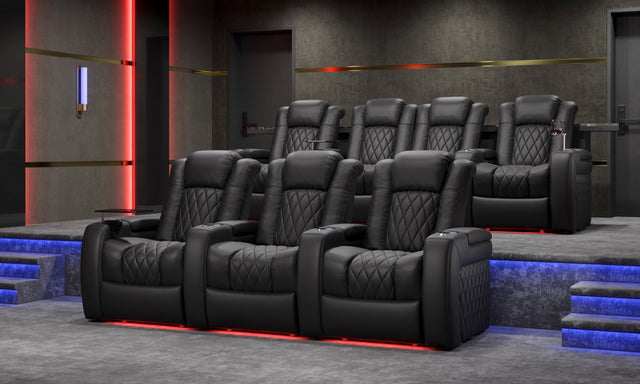
3. Seating Layout and Row Configuration

Seating layout planning starts with the wall width, not the seat count. Measure the finished interior wall width, subtract side clearances, then determine how many seats of your chosen model fit within that constraint.
Side Clearances and Usable Width
• Minimum side clearance: 12 inches from each wall to the edge of the outermost seat. This is technically walkable but tight.
• Comfortable side clearance: 18–24 inches. This accommodates a guest walking through during a film without disrupting anyone in the row.
• ADA-accessible aisle: 36 inches. Not required in private residential builds, but worth considering for accessibility.
For a 12-foot-wide room (144 inches) with 18-inch clearances on each side: 108 inches of usable width. A three-seat row of Valencia Tuscany seats (each seat approximately 28–30 inches wide including armrests) occupies roughly 90 inches — comfortably within that envelope.
Row Depth and Recliner Extension
This is the measurement most often underestimated. A theater recliner requires significantly more floor depth than its seat-depth measurement suggests, because the footrest extends forward when reclined.
• Seat depth (upright): typically 20–24 inches for theater recliners.
• Footrest extension at full recline: typically 18–24 additional inches.
• Required floor depth per row: 42–52 inches from seat back to clearance point in front of the footrest.
• Row-to-row center spacing: 48 inches minimum for rows where people walk through; 54–60 inches where full reclination of both rows must clear simultaneously.
Seat Type Selection
• Individual power recliners: best sightline flexibility, each seat fully independent, maximum comfort. Rows are typically sold in 2-, 3-, or 4-seat configurations.
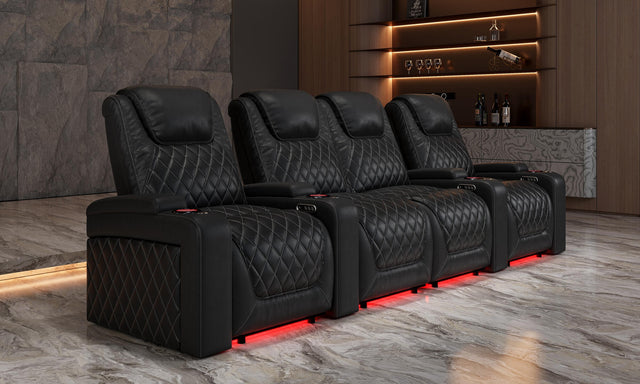
• Console row configurations: seats linked by storage consoles with cup holders and lighting — the most common setup for dedicated theaters. Provides a premium finish and built-in convenience.
• Loveseats: shared seating for couples, maximizes capacity in narrow rooms. Full recline still requires the same floor depth as individual seats.
4. Building a Home Theater Riser

A riser serves one purpose: ensuring every person in the back row has an unobstructed sightline to the screen. If you are building a two-row theater, a riser is not optional — it is the difference between a functional cinema space and an expensive room where half the seats are poor.
Calculating the Correct Riser Height
The riser height must raise the back-row occupant's eye level high enough to see over the front-row headrest. The calculation:
• Measure from the floor to the top of the front-row seat headrest (fully upright). This is typically 44–52 inches for theater recliners.
• The back-row seated eye level must be at least 6 inches above that headrest height.
• Seated eye level = riser height + seat cushion height (typically 18–20 inches) + average torso-to-eye distance (approximately 30–32 inches for a seated adult).
• Working backwards: riser height = (front-row headrest height + 6 inches) − (seat cushion height + torso-to-eye distance).
For most theater recliners, a riser height of 8–12 inches achieves the required clearance. If your ceiling is only 8 feet, stay at the low end (8 inches). With 9-foot ceilings, 10–12 inches is comfortable. Anything above 12 inches requires careful ceiling verification.
Riser Dimensions
• Width: the full interior wall width is ideal. A narrower riser with walking space on the sides also works, but the riser should be at minimum the total width of the back-row seating plus 24 inches on each side.
• Depth: seat depth + full footrest extension + 6-inch safety margin at the front edge. For most theater recliners: 52–60 inches minimum platform depth. This ensures no seat slides off the front edge when fully reclined.
Construction Basics
• Frame: 2×10 lumber on 16-inch centers for spans up to 10 feet; 2×12 for longer spans or heavier loads. A four-seat recliner row fully loaded with occupants can weigh 800+ lbs — engineer for at least 50 lbs per square foot.
• Deck: 3/4-inch tongue-and-groove plywood, glued and screwed to the frame. A second layer of 1/2-inch plywood eliminates flex and deadens footstep noise between rows.
• Finish: carpet matching the room, or a hard-surface edge detail with carpet field. Run low-voltage cabling through the riser interior during framing for LED step lighting at the riser edge.
• Wiring access: the riser interior is valuable conduit space. Before decking, run power and USB conduit from wall outlets to the seat positions above — this is far cleaner than surface-mounted cord management after the fact.
5. Acoustic Treatment and Sound Control

A home theater room without acoustic treatment produces two audible problems: flutter echo (the rapid, metallic reverb of sound bouncing between parallel walls) and bass buildup (low-frequency energy that accumulates in corners, muddying dialogue and the lower octaves of the soundtrack). Both are solved by physical treatment. Neither is solved by a better surround sound system.
First-Reflection Points
Sound from the left speaker travels directly to the listener, and also reflects off the right sidewall before arriving slightly later. That reflection creates comb filtering that colors the tonal balance. The fix is absorption at the point where sound first reflects.
• Locate first-reflection points: sit in the primary listening position. Have a helper hold a mirror against the sidewall and slide it forward until you can see the left speaker — that is the first-reflection point for the right wall. Repeat for all sidewalls.
• Panel specification: 2"×2"×4" rigid fiberglass or mineral wool panels (703 or 705 equivalent), fabric-wrapped. Minimum two panels per side at first-reflection points; four panels per side in a dedicated room.
• Ceiling cloud: a panel or cluster of panels directly above the primary listening area, addressing the ceiling first-reflection point for height channels and early ceiling bounce.
Bass Traps
Low-frequency energy builds up in room corners because pressure maxima occur at boundaries. Bass traps placed floor-to-ceiling in all four corners address this most effectively. For rooms with concrete foundation walls — which describes most Canadian basement theaters — the wall itself provides some absorption, but corner treatment is still required for the interior air column.
Rear Wall Treatment
The rear wall behind the listening position receives direct energy from the front speakers and rear-channel speakers from behind. Broadband absorption panels (4"×4" minimum) across the rear wall, combined with some diffusion if the room is large enough, prevent standing waves from building between the front and rear boundaries.
Floors, Doors, and HVAC
• Flooring: carpet is significantly better than hardwood or tile for room acoustics. Hard floors reflect high frequencies sharply and create floor-first-reflection issues. If hardwood is required, a thick area rug under the seating area mitigates the worst effects.
• Doors: hollow-core doors are acoustically transparent. A solid-core door with a door sweep and compression seals at the jamb adds meaningful isolation. This also reduces light leakage.
• HVAC: air noise from duct velocity is one of the most commonly overlooked problems. Size ducts for the room to keep velocity low, use flexible connections at all duct-to-register transitions, and add duct lining in any supply run that terminates in the theater room.
6. Lighting, Wiring, and Finishing

Everything in this section — wiring, lighting infrastructure, paint, and ventilation — needs to be decided before the walls close. Changes made after drywall is up cost two to five times as much and require patching and repainting that never fully disappears. Treat this stage as final.
Lighting Zones
A properly designed home theater has at least three lighting modes:
• Movie mode: total blackout. Blackout curtains on any windows, door threshold sweep, LED bias lighting behind the screen at approximately 10% brightness. No ceiling fixtures on.
• Navigation mode: step lighting under each riser edge, LED strips under seat bases, aisle lighting at floor level. This is how people move around the room during a film without disturbing others. All fixtures should be on a separate circuit from overhead lighting, dimmable to 5–10%.
• Social mode: dimmable recessed fixtures or sconces at 20–40% for pre-film setup, intermissions, and casual use. Warm white (2700–3000K) to avoid the clinical look of cool white in a dark room.
Bias Lighting
A strip of LED lighting mounted behind the screen, facing the wall, creates a halo of ambient light that the eye uses as a reference for the screen's brightest highlights. This reduces perceived eye strain significantly during long viewing sessions and creates the impression of higher contrast without changing the display's actual settings. Use 6500K daylight-temperature LEDs at low brightness — roughly 10% of a reference white on screen.
Wiring Rough-In Checklist
• Power to seating wall: theater recliners draw approximately 1–2A each for motors and USB charging. A dedicated 15A circuit to the seating wall (not shared with the projector or AV rack) prevents voltage sag during simultaneous operation.
• HDMI conduit: run 1.5-inch conduit from the projector ceiling mount to the AV rack location. Pull a rope through during rough-in so cables can be added or replaced later. Never rely on a single cable run without conduit — display technology changes faster than renovation cycles.
• Speaker wire: 14-gauge in-wall rated (CL2 or CL3) to all speaker positions. Run to left, center, right, and both rear surround positions as a minimum; add ceiling positions for Dolby Atmos height channels if budget allows. Label every run at both ends before walls close.
• Step lighting: low-voltage (12V DC) runs to each riser step edge and under each seat. These are typically LED strips powered by a single transformer — route all runs to a central transformer location.
• Network: Cat 6 to the AV rack position for the streaming device, and a second run to the projector mount for IP control integration.
Wall Color and Finishes
Every surface in the room that reflects light is competing with the screen. The correct approach:
• Walls: dark charcoal, deep navy, dark green, or flat black. Avoid any warm neutral — even a dark beige will reflect enough warmth to affect perceived screen color balance.
• Ceiling: match the walls or go darker. Recessed fixtures in a dark ceiling are nearly invisible when off and create very little spill when on.
• Trim and baseboards: match the wall color. White baseboards act as light reflectors at floor level and break the room's visual continuity.
• Carpet: dark — charcoal, dark gray, or black. Avoid patterns that draw the eye.
Ventilation and Temperature
A sealed, dark room with multiple people and electronics running generates significant heat. A projector alone adds 200–400W of heat. Plan for active ventilation: either a mini-split dedicated to the theater room, or a properly sized branch from the central HVAC system with enough CFM capacity for the room volume plus equipment load. Target 65–70°F (18–21°C) during viewing. Leather seating performs better in consistent temperatures — avoid rooms that swing more than 10°F between heated and unheated states.
Frequently Asked Questions
What is the minimum room size for a home theater?
The practical minimum for a single-row home theater is 10 feet wide by 14 feet deep. At those dimensions you can fit a two- or three-seat row with side clearances and a 100–110" screen at a reasonable viewing distance. Two-row builds require significantly more depth — a minimum of 22–24 feet — to accommodate front-row seating, a rear riser, and the walkable aisle between rows.
Do I need a riser if I only have one row of seats?
A riser is not required for single-row setups, but it can be beneficial. Elevating a single row of seats by 6–8 inches changes the viewing angle relative to the screen, which some homeowners find more comfortable — particularly in rooms where the screen center is lower than ideal. It also creates a cleaner visual presentation and allows for under-seat LED lighting. Whether to build one is a preference and budget decision, not a functional requirement, when there is only one row.
How far from the screen should the front row be?
The standard recommendation is 1.0–1.5 times the screen width, measured from the screen surface to the front of the seat. At 1.0× you get a highly immersive field of view similar to a commercial cinema's premium front section. At 1.5× the experience is more comfortable and relaxed for extended viewing. Most homeowners with a 120" screen land somewhere around 12–13 feet from screen to seat back, which falls in the comfortable 1.25–1.5× range for that screen size.
What is the ideal ceiling height for a home theater with two rows?
Nine feet is the minimum ceiling height for a two-row theater with a riser. At 9 feet, an 8–10 inch riser leaves approximately 7 feet 2 inches of headroom on the back platform, which is workable for most users. Ten-foot ceilings are significantly more comfortable — they allow a 10–12 inch riser while maintaining full standing headroom on the back platform and give the room a less compressed feel overall. Eight-foot ceilings make two-row builds with a riser very challenging and are generally not recommended.
Can I build a home theater in an above-grade room?
Yes, with additional investment in light control and soundproofing. Above-grade rooms require blackout curtains or cellular shades on all windows, door threshold seals to prevent light leak, and decoupled wall construction (staggered stud or double-stud framing) if sound isolation between the theater and adjacent rooms is a priority. Canadian above-grade builds are often on the main floor or second floor of a home — the acoustic isolation challenge is primarily about protecting the viewing experience from household noise rather than managing basement humidity, which is the opposite concern compared to a basement build.
How much does acoustic treatment actually matter?
Acoustic treatment makes a larger audible difference in a home theater than most equipment upgrades. Flutter echo — the distinctive metallic slap that occurs when sound bounces between parallel untreated walls — reduces dialogue intelligibility and makes the room fatiguing to listen in during extended viewing. Bass buildup in corners colors every low-frequency event in the soundtrack. Both issues persist regardless of how good the speakers or receiver are. A room treated with proper first-reflection panels and corner bass traps sounds dramatically cleaner, and the effect is immediately obvious on any content with complex soundtracks.
What electrical work do I need before closing the walls?
At a minimum: a dedicated 15A circuit to the seating wall for recliner power and USB charging; an HDMI conduit from the projector ceiling mount to the AV rack location; speaker wire runs to all speaker positions (left, center, right, rear left, rear right, and ceiling positions if planning Atmos); low-voltage runs for step lighting and under-seat LED strips; and Cat 6 network cable to the AV rack and projector mount. All of these are significantly easier and less expensive to run during framing than after drywall is installed.
How do I manage humidity in a basement home theater in Canada?
The target relative humidity for a basement home theater is 45–55% year-round. Canadian basements commonly exceed 60–70% RH in summer without active dehumidification — levels that accelerate leather conditioning breakdown, promote mildew in acoustic panels, and can cause condensation damage in AV equipment. Install a whole-home or room-specific dehumidifier with a floor drain connection so it operates continuously without manual emptying. Insulating the below-grade exterior walls with closed-cell spray foam rather than batt insulation also dramatically reduces moisture migration from outside. Monitor humidity with a hygrometer and condition leather seating every 6–12 months regardless of the RH readings.


