
In this article: A practical layout guide for designing a home wellness room around a massage chair and infrared sauna — covering anchor placement, clearance requirements, zone planning, electrical considerations, lighting, and finishing details.
- The Two-Anchor Framework: Sauna and Massage Chair First
- Clearance Requirements: Recline, Walkways, and Wall Distance
- Zone Planning: Hot, Warm, and Cool Areas
- Electrical and Heat Management
- Lighting Design for a Wellness Room
- Finishing Touches: Flooring, Storage, and the Cool-Down Seat
- Frequently Asked Questions
A home wellness room works best when the two anchor experiences — massage chair and infrared sauna — are placed first, with everything else planned around their clearances, power needs, and heat zones. When the layout makes sessions effortless, the room feels less like a repurposed spare bedroom and more like a private retreat you use consistently.

The sequencing matters: anchors set the constraints, zones follow from the anchors, and styling comes last. Getting the order right prevents the most common mistake — choosing a room or arranging furniture first, then discovering clearance problems after the fact.
Quick Takeaways
• Place the sauna where ventilation and electrical access are easiest — then fit the massage chair around it.
The sauna has the strictest placement requirements. Let it drive the layout, not the other way around.
• Separate the "hot" zone and the "cool" zone deliberately.
Sauna heat and airflow should never blow directly onto massage chair upholstery, electronics, or power components.
• Plan electrical before finalizing furniture position.
Cords crossing walkways, power strips on the floor, and outlets in the wrong wall are the fastest way to make a premium room feel cluttered.
• Layered lighting — ambient, task, and accent — lets one room serve multiple modes.
A session in progress feels different from a post-sauna cool-down. Dimmable warm lighting handles both.
• A cool-down recliner is not optional — it completes the ritual.
The transition from heat or massage to quiet recovery is where the room earns its value. Plan for it from the beginning.
1. The Two-Anchor Framework: Sauna and Massage Chair First

Treat the sauna and massage chair as the two non-negotiables. Every other piece — the cool-down seat, the storage cabinet, the lighting — arranges itself around these two anchors once their positions are locked.
Choose the room based on use, not just square footage
The best wellness room is one you will use consistently, which means it needs to be accessible, private, and close to a bathroom if your routine includes showering. Bedrooms, basements, and bonus rooms all work. Proximity to a bathroom for post-sauna showering is worth prioritizing when you have options.
Sauna placement priorities
The sauna has the strictest placement requirements: clearance on all sides per manufacturer spec, access to the door, ventilation, and a dedicated electrical circuit in most cases. Choose its position based on where all three of those are easiest to satisfy — usually along an exterior wall with access to the electrical panel, or in a corner that allows ventilation without blocking egress.
Massage chair placement priorities
Once the sauna is positioned, place the massage chair where:
• Full recline is unobstructed (no wall, door swing, or furniture within the reclined footprint)
• There is clear access around both sides of the chair
• The chair is away from direct sauna heat output — ideally in the cooler half of the room
2. Clearance Requirements: Recline, Walkways, and Wall Distance

The most common planning failure is positioning furniture based on upright dimensions. A massage chair in the upright position takes up one footprint; fully reclined, it takes up a larger one. Always plan for the reclined position.
| Planning Item | What to Measure | Why It Matters |
|---|---|---|
| Full recline footprint | Chair length when fully reclined plus leg extension | Prevents wall contact and cramped entry/exit |
| Rear wall clearance | Distance from chair back to wall (varies by model — check spec sheet) | Ensures smooth recline and protects wall surfaces |
| Side access clearance | Space to step in, step out, and reach controls from both sides | Makes daily use feel effortless, not awkward |
| Walkway width | Door-to-chair path and chair-to-sauna path when chair is reclined | Improves flow and eliminates tripping hazards |
| Door swing arcs | Room door, closet door, and sauna door clearance arcs when fully open | Avoids collisions and pinch points with a reclined chair |
Wall hugger mechanisms and compact rooms
If the room is tight, a wall hugger recliner mechanism requires only 4–6 inches of rear clearance compared to 18–24 inches for a standard recline. This can free up meaningful depth in a smaller room without sacrificing full recline function.
3. Zone Planning: Hot, Warm, and Cool Areas

A functional wellness room has three distinct zones. Naming them before you plan furniture placement prevents the most common layout mistakes.
The hot zone (sauna area)
This is where heat concentrates. Keep all upholstered seating, electronics, and power components outside the direct heat exhaust path from the sauna. The hot zone should have a clear entry path and enough clearance around the sauna door to use it comfortably without bumping other furniture.
The therapy zone (massage chair)
The therapy zone is where the primary treatment experience happens. Position the massage chair where it feels secluded but not cramped — a corner placement works well if clearance allows. Maintain open circulation from the sauna to the chair so moving between them feels natural.
The cool-down zone (recovery recliner or lounge)
The cool-down zone is often overlooked in initial planning, but it is where the session closes. After sauna heat or massage, the body needs a few minutes of quiet recovery — sitting still, sipping water, slowing breathing. A recliner or lounge seat, a small table, and a place to set a towel or robe make this transition feel intentional rather than informal.
The storage zone
Towels, conditioning products, aromatherapy, slippers, and cleaning supplies belong behind closed doors. Open storage in a wellness room quickly makes it look like a utility closet. Plan for a cabinet, credenza, or tall shelf unit with doors, and allow one curated open element at most — a tray with a carafe, or a single plant.
4. Electrical and Heat Management

Most wellness rooms look cluttered because electrical planning was treated as an afterthought. Visible cords, floor-level power strips, and extension cables crossing walkways are all preventable when the layout is planned with power locations in mind.
Sauna electrical requirements
Most infrared saunas require a dedicated circuit. The voltage and amperage rating varies by model — verify in the product manual before selecting an outlet location. In many Canadian homes, a licensed electrician will need to add a circuit or confirm that existing wiring meets the load requirement. Do not use a standard household circuit without confirming it is rated for the's draw.
Massage chair power
Most massage chairs plug into a standard 15A or 20A outlet. What matters is where the outlet is positioned — ideally directly behind or beside the chair so the cord does not cross a walkway. If the chair has a wall hugger mechanism, the outlet must be positioned to account for the chair's forward slide during recline.
Heat separation from electronics
Keep the massage chair, its power supply, and any audio or control electronics out of the sauna's direct heat exhaust path. Heat accelerates component wear and can damage upholstery over time. If the room is small and heat separation is difficult, a dehumidifier and active ventilation help manage ambient temperature and humidity near the seating zone.
Basement-specific considerations
Basement wellness rooms are popular in Canada because they offer natural privacy and quiet. The additional considerations are moisture control and ventilation. A dehumidifier is often necessary to maintain ambient humidity at a level that protects leather upholstery, wood finishes, and electronics. Confirm that your HVAC system can circulate air into the basement wellness space or plan a supplementary ventilation solution.
5. Lighting Design for a Wellness Room

Lighting is the fastest way to change how a room feels. A wellness room that uses harsh overhead lighting will never feel restorative regardless of what equipment is in it. Layered warm lighting costs less than most furniture and delivers a disproportionate impact on the room's atmosphere.
Color temperature
Use warmer color temperatures (2700K–3000K) throughout the wellness room. Cooler, bluer light (4000K+) signals alertness — the opposite of what a recovery environment needs. The exception is a grooming mirror or task light, where accurate color rendering is useful.
Layered lighting: three types
• Ambient: ceiling or cove lighting that provides even room illumination at low intensity
• Task: a directed light for the cool-down seat, towel storage area, or a reading position
• Accent: a wall wash, shelf light, or backlight behind seating that adds depth without glare
Dimming and session modes
All three layers should be on dimmers. This allows the same room to function as an active preparation space, a session environment, and a quiet recovery space by adjusting the intensity of each layer independently. A simple smart switch or standard rotary dimmer achieves this without additional complexity.
6. Finishing Touches: Flooring, Storage, and the Cool-Down Seat

Once the anchors, clearances, zones, electrical, and lighting are resolved, the finishing layer is relatively straightforward. The goal is to make the room feel premium and calm — not overstylized or over-accessorized.
Flooring
Luxury vinyl plank (LVP), sealed concrete with a rug, or tile with a cushioned mat are the most practical choices. All three are moisture-tolerant, easy to clean, and stable under the weight of a massage chair. In the seating zone, add a plush area rug to absorb sound and improve warmth underfoot — especially in a basement where concrete is cold.
Palette and materials
Limit the room to two or three core materials: warm wood, matte metal, and a soft textile. More than three materials creates visual noise that works against the calm that a wellness room is supposed to deliver. Let the seating be the focal point and keep accessories to a minimum — one tray, one plant, one piece of art.
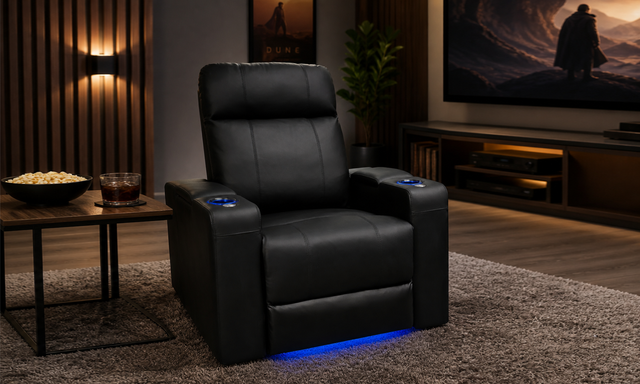
The cool-down seat as the room's focal point
In a room designed around two pieces of equipment, the cool-down recliner is the element that completes the ritual and gives the room its character. A premium heat-and-massage recliner in this position doubles as both the recovery seat and the room's visual anchor — it does more work per square foot than any other element in the space.
Frequently Asked Questions
What is the minimum room size for a home wellness room with a sauna and massage chair?
There is no universal minimum, because it depends on the specific sauna model's clearance requirements and the massage chair's fully reclined footprint. Plan around those two specs first — once you can fit both anchors with open walkways and required clearances, the room is large enough. Rooms in the 150–200 square foot range typically work well for a dedicated setup.
How far should the massage chair be from the infrared sauna?
Keep the chair far enough that sauna heat exhaust does not blow directly onto the upholstery or the chair's electronics. The specific distance depends on your sauna model's ventilation path. As a practical rule, place the chair in the cool half of the room and ensure open air movement between the two pieces rather than heat building up in the seating zone.
Does an infrared sauna need a dedicated electrical circuit?
Most infrared saunas require a dedicated circuit. The amperage and voltage requirements vary by model — check the product manual before finalizing placement or purchasing materials. A licensed electrician should confirm that wiring is code-compliant before first use.
Can I put a wellness room in a Canadian basement?
Yes — basements are well-suited for wellness rooms because they offer natural privacy and acoustic separation. The additional considerations are moisture control and ventilation. Run a dehumidifier to maintain safe humidity levels for leather upholstery and electronics, and confirm that your HVAC or supplementary ventilation can circulate air into the space adequately.
What flooring is best under a massage chair?
LVP, sealed concrete, or tile are the most practical choices — all are moisture-tolerant and stable under heavy furniture. Add a quality area rug under and around the chair to absorb vibration sound and add warmth underfoot. Avoid plush carpet directly under the chair's base, as it can destabilize the chair and make entry and exit awkward.
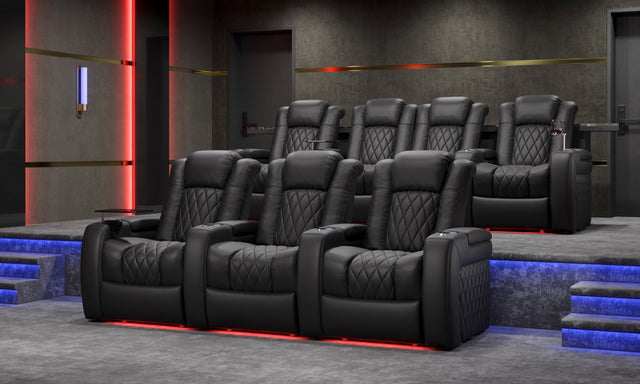
Can a massage recliner be used in a home theater room?
Yes. A heat-and-massage recliner works well in a home theater room when sightlines and recline clearance are planned correctly. In a multi-row setup, confirm that the headrest at full recline does not obstruct sightlines for viewers behind. In a single-row setup, prioritize screen height and viewing distance first, then choose a recline angle that supports both movie-watching and recovery sessions.
What color temperature lighting is best for a wellness room?
Use 2700K–3000K (warm white) throughout the main wellness space. Cooler light temperatures (4000K+) promote alertness and work against the restorative atmosphere you are trying to create. All fixtures should be dimmable so you can adjust intensity for different session modes — preparation, active session, and quiet recovery.
How do I stop a wellness room from looking cluttered?
Three decisions prevent most clutter: plan electrical before placing furniture so cords never cross walkways; use closed storage for all towels and accessories; and limit the palette to two or three materials. Let the seating be the room's focal point and resist adding decorative items beyond one tray, one plant, and one piece of art.


