
In this article: A room-by-room guide to home theater seating layouts — covering how dimensions determine your options, single-row and two-row configurations, small and large room layouts, and a step-by-step measurement process to finalize your plan before ordering.
- How Room Dimensions Determine Your Layout Options
- Single-Row Layouts: Three Configurations
- Two-Row Layouts: Getting the Second Row Right
- Small Room Layouts: Under 12 Feet Wide
- Large Room Layouts: 14 Feet Wide and Above
- Measuring and Finalizing Your Layout
- Frequently Asked Questions
A seating layout that works on paper can fail completely in an actual room if the measurements were taken from the wrong reference points or the recliner's floor footprint was underestimated. Layout planning for home theater seating begins with two room measurements — width and depth — and works outward from there to screen placement, row count, and seat count. Every decision is a consequence of those two initial numbers.

This guide covers every common layout scenario from a 10-foot-wide single-row setup through large two-row builds with risers. Use the tables and worked examples to map your room before ordering any seating.
Quick Takeaways
• Usable width determines seat count, room depth determines row count.
Start with these two numbers. Usable width equals room width minus both side clearances. Room depth must accommodate viewing distance plus all row floor depths plus rear clearance.
• Recliner floor depth is 44–54 inches per row — not the seat's upright depth.
A theater recliner at full extension requires 20–24 additional inches beyond its upright seat depth. Every row needs this full footprint of floor space, not just the upright dimension.
• A flat-floor two-row layout only works if the screen is very high.
Without a riser, rear-row sightlines are blocked by front-row headrests unless the screen center is 6+ feet from the floor. In most rooms, a riser is required for two-row builds.
• Small rooms (under 12 ft wide) can still host premium seating.
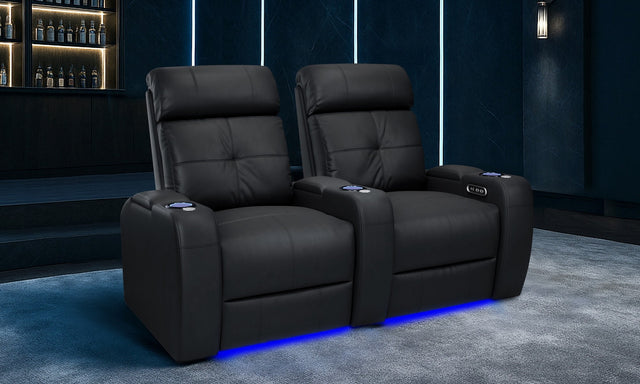
A 10-ft wide room fits a 2-seat row comfortably or a loveseat pair. Plan side clearances at 16–18 inches and choose seats with a width and extension that fit the available depth.
• Always mock up with tape before ordering.
Mark the front-row position, side clearances, and full recliner extension on the floor with painter's tape. Walk through the layout physically before committing to a seat model and configuration.
1. How Room Dimensions Determine Your Layout Options

Room width governs how many seats fit in a row. Room depth governs how many rows fit in the room. These are independent constraints — a narrow, deep room may only fit two seats across but can accommodate two rows. A wide, shallow room may fit five seats across but only one row.
Usable Width Calculation
Usable width equals the room's interior wall-to-wall dimension minus side clearances. Side clearances are the empty floor space between the outermost seat edge and the wall.
• Minimum side clearance: 12 inches (tight; passable sideways only).
• Comfortable side clearance: 18 inches (most common planning target).
• Generous side clearance: 24 inches (recommended when the side aisle is a primary entry/exit path).
For a 144-inch (12 ft) wide room with 18-inch clearances: 144 − 36 = 108 inches usable. A standard theater recliner is 28–30 inches wide including armrests. A 3-seat row occupies approximately 88 inches — comfortably within 108 inches.
| Room Width | Side Clearances (18 in each) | Usable Width | Max Seat Count (28 in/seat) | Comfortable Seat Count |
|---|---|---|---|---|
| 10 ft (120 in) | 36 in | 84 in | 3 | 2 (with extra clearance) |
| 11 ft (132 in) | 36 in | 96 in | 3 | 3 |
| 12 ft (144 in) | 36 in | 108 in | 3–4 | 3 |
| 13 ft (156 in) | 36 in | 120 in | 4 | 4 |
| 14 ft (168 in) | 36 in | 132 in | 4–5 | 4 |
Room Depth and Row Feasibility
| Room Depth | Rows Feasible | Screen Size Range | Notes |
|---|---|---|---|
| 14–16 ft | 1 | 100–110" | Front row at 1.0–1.25× screen width; single row only |
| 17–20 ft | 1 (comfortable) | 110–120" | Front row at 1.25–1.5× screen width; room for rear path |
| 20–24 ft | 2 (tight) | 110–120" | Two rows feasible with 48 in center-to-center; riser recommended |
| 24–28 ft | 2 (comfortable) | 120–135" | Two rows with riser and 60 in center-to-center; full simultaneous recline |
2. Single-Row Layouts: Three Configurations

Single-row layouts are the most common home theater configuration and offer three meaningful variations depending on room width, screen size, and viewing preferences.
Configuration A: Straight Row
All seats parallel to the screen, in a straight line. This is the standard and simplest arrangement. All seats are at the same distance from the screen, which means all positions receive approximately equal audio and image quality. A straight row works in any rectangular room wide enough to hold the desired seat count with adequate side clearances.
The limitation: end seats in a wide straight row have a viewing angle disadvantage. At 5+ seats, the outermost positions are at 20–30° off-axis from the screen center. This is acceptable for casual viewing but noticeable during critical viewing of film content.
Configuration B: Curved Row
Seats arranged on a gentle arc, with end seats angled 5–10° inward toward the screen center. This is standard practice in commercial cinema design and addresses the off-axis viewing problem for wider rows. All seats face the center of the screen at approximately equal angles, improving image geometry for all positions.
In practice, a curved row requires either purpose-built curved row seating (available for some commercial configurations, rare in residential) or individual recliners positioned on a curved platform or angled pads. Most homeowners achieve a practical version of this by angling only the end seats — the two outermost positions — inward by 10–15° while keeping center seats straight.
Configuration C: Floating Row
The seating row is positioned away from the back wall, with a walking path behind the row. This is the correct approach when the room is deep enough that pushing the row to the back wall would place it at an uncomfortably far viewing distance. It also allows guests to arrive and exit without walking in front of the screen. Minimum clearance behind the row: 24 inches for a passable path; 36 inches for comfortable walking.
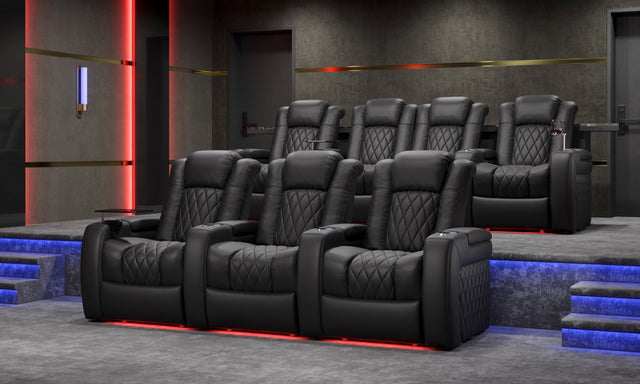
3. Two-Row Layouts: Getting the Second Row Right

A two-row layout without a riser is rarely successful. The back-row sightline problem — front-row headrests blocking the bottom quarter of the screen for rear occupants — is only resolved by either raising the screen very high (above 5.5 ft to center) or elevating the rear row on a platform. In most rooms with standard ceiling heights, a riser is the only practical solution.
Riser Height for Sightline Clearance
The riser height must raise the rear-row occupant's eye level enough to see over the front-row headrests. The calculation: measure from the floor to the top of the front-row headrest (typically 48–52 inches for theater recliners). Add 6 inches of clearance. The rear-row seated eye level (riser height + seat height ~20 in + seated eye offset ~30 in) must equal or exceed this. For most setups, a riser of 8–12 inches achieves the necessary clearance.
Row Staggering for Better Sightlines
Even on a riser, rear-row occupants benefit from lateral staggering: shifting the back row 14–18 inches sideways so each viewer looks between two front-row headrests rather than directly behind one. This requires absorbing the offset in the side clearance on one side of the room — ensure your room width allows for the stagger before planning around it.
Center-to-Center Spacing
• 48 inches: minimum for a walkable aisle, front row reclines, rear row upright only.
• 54 inches: comfortable aisle, front row reclines freely, rear row reclines with care.
• 60 inches: generous aisle, both rows can fully recline simultaneously. This is the target for premium two-row builds.
4. Small Room Layouts: Under 12 Feet Wide

Rooms under 12 feet wide present real constraints but are not incompatible with a quality home theater experience. The adjustments are specific and predictable.
10-Foot Wide Room
Usable width at 16-inch side clearances: 120 − 32 = 88 inches. A 2-seat row at 28 inches per seat: 56 inches — fits with 32 inches to spare. A 3-seat row: 84 inches — fits at 88 inches with 4 inches of margin. A 3-seat row is technically feasible in a 10-foot wide room with minimal side clearances, but a 2-seat arrangement is more practical and leaves comfortable walking space.
• Screen: 100–110 inches at 1.0–1.25× screen width viewing distance.
• Seat recommendation: compact or standard theater recliner (not big-and-tall, which adds width).
• Alternative: a loveseat (52–58 inches wide) with two reclining seats provides a coupled experience with a single piece that fits comfortably.
11-Foot Wide Room
Usable width at 18-inch side clearances: 132 − 36 = 96 inches. A 3-seat row at 28 inches per seat: 84 inches — fits with 12 inches to spare beyond the row. Three seats is the comfortable target for an 11-foot room. A 4-seat row at 28 inches: 112 inches — exceeds usable width and does not fit.
• Screen: 110 inches at 1.25× viewing distance.
• Note: if the room has a centered door on one wall, plan the door's opening arc so it does not swing into the seating footprint or side clearance zone.
Depth Considerations for Small Rooms
In small rooms where width limits seat count, depth often becomes the primary constraint. A 10-foot deep room with a 100-inch screen at 1.0× viewing distance (87 inches) leaves only 33 inches for the seat floor depth — not enough for a power recliner at full extension. Minimum practical depth for a single-row power recliner setup: 14 feet.
5. Large Room Layouts: 14 Feet Wide and Above

Rooms 14 feet wide and above open up layout options that smaller rooms cannot accommodate — wider rows, VIP center sections, and hybrid configurations that combine theater seating with supplementary casual seating.
14-Foot Wide Room
Usable width at 24-inch side clearances: 168 − 48 = 120 inches. A 4-seat row at 28 inches per seat: 112 inches — fits with 8 inches to spare. A 4-seat row is the natural fit for a 14-foot room. With 30-inch-wide seats: 120 inches — exact fit, leaving no additional margin. Confirm seat width with the manufacturer before planning a 4-seat row in a 14-foot room.
15+ Foot Wide Rooms: VIP Center Sections
In rooms 15 feet and wider, a VIP center arrangement becomes practical: a 3-seat center row with independent 1-seat positions on either side, offset slightly toward the walls. The flanking seats can be on slightly elevated individual platforms (4–6 inches) or simply positioned with extra side clearance. This creates a premium center zone while accommodating extra viewers at the sides.
Adding a Rear Social Area
In deep rooms (26+ ft) where two rows are already planned, remaining depth behind the back row can accommodate a wet bar, snack counter, or standing/casual seating area. This zone works well at 36–48 inches of depth behind the rear-row seat backs. Step lighting between the riser and the social area is essential for safety and atmosphere.
6. Measuring and Finalizing Your Layout

Before ordering any seating, complete the following sequence with a tape measure and painter's tape on the actual room floor. Do not rely on floor plan software alone — real rooms have obstacles that plans do not show.
Step-by-Step Layout Verification
• Step 1: measure the true interior wall dimensions (wall to wall, finished surfaces). Note any protrusions — electrical panels, HVAC vents, structural columns, door swings.
• Step 2: mark the screen position on the front wall. Measure the screen's width and mark the left and right edges with tape on the wall. Mark the screen center height on the wall.
• Step 3: calculate the front-row viewing distance (1.0–1.5× screen width). Measure from the screen face — not the wall — to where the front of the front-row seat will sit. Mark this line across the room floor with tape.
• Step 4: from the front-row tape line, measure backward the full recliner floor depth (seat depth + extension + margin). Mark a second tape line — this is the rear edge of the front-row footprint. The area between these two lines must be clear.
• Step 5: if planning two rows, measure the center-to-center distance from the rear edge of the front-row seat back and mark the rear-row position. Add another recliner floor depth and mark the rear edge of the back-row footprint.
• Step 6: mark the side clearances on both sides of each row. Verify that the seating width fits within the side clearance markers.
• Step 7: walk through the layout. Sit in a chair positioned at the front-row tape line. Look at where the screen center mark is on the wall. Confirm the viewing angle is comfortable. Verify that all aisle paths are walkable.
Only after completing this physical verification should you confirm your seat model, configuration, and order quantity. The 30 minutes spent with tape measures and painter's tape prevents the far more expensive mistake of receiving seating that does not fit.
Frequently Asked Questions
What is the minimum room size for a home theater?
The practical minimum for a single-row home theater with a 100" screen is 10 feet wide by 14 feet deep. At those dimensions you can fit a 2-seat row with side clearances and place the front row at approximately 1.0× the screen width — the immersive distance for a 100" screen. A 12×18 ft room is the comfortable single-row minimum that allows a 110–120" screen at a relaxed viewing distance with proper side clearances.
Can I have a curved seating row in a rectangular room?
Yes, in a modified form. True curved rows require purpose-built curved platforms or custom seating configurations that are complex in residential builds. The practical alternative — angling only the end seats 10–15° inward — achieves most of the sightline benefit without the construction complexity. Individual power recliners can be positioned at any angle; the floor depth footprint of the angled end seats must still be verified to ensure full recliner extension clears any adjacent obstacle.
How many seats fit in a 12-foot wide home theater room?
A 12-foot (144-inch) wide room with 18-inch side clearances on each side gives 108 inches of usable seating width. A standard theater recliner is 28–30 inches wide including armrests. Three seats at 28 inches: 84 inches — fits comfortably with 24 inches to spare. Four seats at 28 inches: 112 inches — exceeds the 108-inch usable width. A 12-foot room is a solid 3-seat single-row room; a 4-seat row typically requires a minimum 13.5-foot interior room width.
Do you need a riser for two rows of seating?
In almost all cases, yes. Without a riser, the back-row occupants' sightline to the bottom portion of the screen is blocked by the front-row headrests unless the screen center is positioned at 5.5 feet or higher from the floor. At that height, the front row itself would be looking up at an uncomfortable angle. The riser is the standard engineering solution — it elevates the back row 8–12 inches so its occupants look over the front-row headrests without requiring an uncomfortably high screen position.
Can I mix recliners and a sofa in the same home theater?
Yes, in a media room or hybrid space. A common configuration: a 3-seat recliner row as the primary viewing position and a sectional sofa or loveseat at the rear or sides for overflow seating. The sightline consideration: sofa occupants will typically sit at a higher eye level than reclined theater-seat occupants, which can work well if the sofa is positioned behind the recliner row. In a dedicated theater with calibrated viewing positions, mixing seating types creates inconsistent optimal viewing positions and is less common.
What is sightline staggering and do I need it?
Sightline staggering shifts the back row 14–18 inches laterally so each rear-row viewer looks between two front-row headrests rather than directly behind one headrest. Even with a properly sized riser, a headrest in the direct sightline can create a visual distraction at the bottom of the screen frame. Staggering eliminates this. It is not strictly required if the riser height provides sufficient eye-level clearance above the front-row headrest tops, but it is good practice in any serious two-row build.
How do I plan a theater layout without a designer?
The sequence is: (1) measure room width and depth precisely; (2) choose screen size and calculate front-row viewing distance; (3) get exact seat dimensions from the manufacturer — upright depth, full recliner extension, and seat width; (4) calculate whether seat count and rows fit using the formulas in this guide; (5) mark everything on the actual room floor with painter's tape and walk through it physically before ordering. This process catches the most common mistakes before any money is committed.
What happens if my room is not perfectly rectangular?
Irregular rooms — L-shapes, rooms with angled walls, or rooms with structural columns — require treating the usable rectangular portion as the planning area and ignoring the rest. The screen must go on a flat wall. The seating rows must face that wall. Any wall irregularity that protrudes into the seating zone must be treated as a fixed obstacle and accounted for in the side clearance measurement. Rooms with a single column within the seating area can sometimes be worked around by designing the row to bracket the column, but this requires careful measurement of the resulting clearances on both sides of the column.


