
In this article: A room-by-room planning guide for Canadian basement home theatres — covering how to measure and work within basement constraints, display selection, riser design, humidity and HVAC requirements, seating layout options, and how to get large theater seats into a below-grade room.
- Measuring Your Basement: What to Check Before Planning
- Projector vs. TV: Choosing the Right Display for a Basement
- Riser Design for Basement Home Theatres
- Humidity and HVAC: The Canadian Basement Reality
- Layout Configurations for Basement Rooms
- Delivering and Installing Large Seating in a Basement
- Frequently Asked Questions
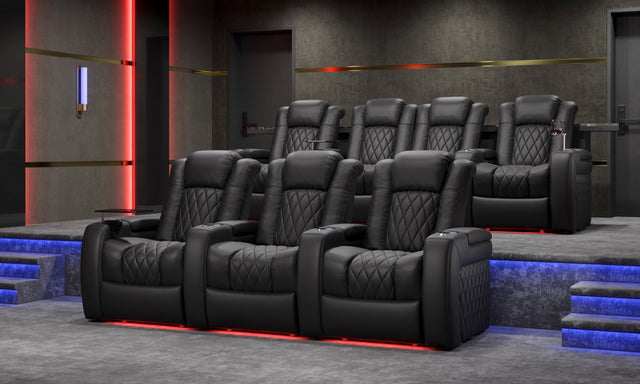
The basement is the most common location for a dedicated home theatre in Canada — and for good reason. Below-grade rooms offer natural light control, acoustic isolation from the rest of the house, and open floor plans that can be configured specifically for viewing. The challenges are equally predictable: ceiling height restrictions, concrete slab humidity, structural posts that interrupt seating layouts, and narrow stairwells that complicate delivery of large furniture. Each of these has a well-established solution. This guide covers all of them.

Canadian basements vary significantly by province, construction era, and builder — a 1970s concrete-block Winnipeg basement and a 2015 poured-concrete Toronto walkout are fundamentally different planning environments. This guide addresses the common constraints that apply across most Canadian basement builds.
Quick Takeaways
• Ceiling height under 84 inches limits riser options — measure before planning.
Most Canadian basements have finished ceilings between 84 and 96 inches. Below 84 inches, a riser becomes structurally impractical. Below 90 inches, riser height must be kept to 6 inches or less. Measure at every support beam, not just the open-span areas.
• A projector paired with a 120" screen outperforms a large TV in most basements.
Basement rooms are naturally dark and light-controlled — the one environment where projector image quality reliably exceeds what a TV can deliver at the same budget. An ambient-light-rejecting (ALR) screen is not required in most basements.
• Vapour barrier under any wood framing is not optional in Canadian basements.
Moisture wicking from concrete slab into lumber is the primary cause of basement renovation failure. CMHC guidelines and the National Building Code both call for a continuous vapour barrier between concrete and any wood structure, including theater risers.
• Structural posts within the seating zone can be worked around — plan around them early.
An interior support column that falls in the center of the planned seating row forces a row split. Identify all column locations before planning the layout. A column that falls between two seats is a minor inconvenience; one that falls where a seat needs to go requires a full redesign.
• Most residential theater seats arrive in components that fit standard stairwells.
Valencia theater seats ship disassembled and are typically 30–36 inches wide per box. A standard Canadian residential stairwell at 36 inches wide accommodates delivery when the stair path is clear. Confirm box dimensions with the manufacturer before your delivery date.
1. Measuring Your Basement: What to Check Before Planning

Basement planning requires more measurements than a main-floor room because the space has more fixed obstacles. Take every measurement before committing to any layout plan.
Ceiling Height
Measure from the finished floor (or the concrete slab if not yet finished) to the lowest fixed obstruction — not the open-span ceiling. The lowest point is usually a main beam, HVAC duct, or drain pipe. For theater use, the practical minimums are:
• Under 84 inches (7 ft): single-row setup only, no riser. Screen height is constrained — a 100" screen at 16:9 is 49 inches tall; position the screen center at 42–44 inches from the floor to keep the top edge below the ceiling line.
• 84–90 inches: single row standard, or two rows with a maximum 6-inch riser. Confirm headroom on the riser: ceiling height minus riser height minus 20 inches (seat cushion) must exceed 48 inches (minimum clearance above seated head).
• 90–108 inches (standard unfinished): two-row builds with 8–10 inch risers are feasible. This is the most common planning scenario for Canadian basements built since the 1980s.
Structural Posts and Columns
Mark the center location of every structural post on a floor plan sketch. Posts in Canadian residential basements are typically 3.5-inch steel lally columns on 8–12 ft centers. The critical question: does any post fall within the planned seating zone?
• Post between two seats: design the gap between the two seats (armrest-to-armrest) to bracket the post with 4+ inches of clearance on each side. This is achievable with most seat configurations.
• Post directly behind a seat position: the row must shift laterally or that seat position must be eliminated. Posts cannot be relocated without structural engineering work — design around them.
HVAC, Electrical, and Drain Locations
Mark forced-air supply and return locations. A supply duct blowing warm or cool air directly onto the seating row creates a comfort problem. Ducts that terminate on the display wall behind the screen can interfere with acoustic panels and projector cooling. Identify any floor drains — floor drain locations constrain where the riser can be built, since the platform cannot cover a drain that serves the basement's wet areas.
Stairwell Location and Width
Note where the stairwell opens into the basement room and the direction of the stair run. The stairwell opening determines where people enter the theater space. A stairwell that opens at the front of the room (between the seating row and the screen) creates a traffic flow conflict — occupants walking to their seats cross in front of viewers already seated. Wherever possible, design the seating layout so the stairwell opens behind or to the side of the seating row.
2. Projector vs. TV: Choosing the Right Display for a Basement

A below-grade basement with no windows (or blackout-treated windows) is the ideal environment for a projector. The same characteristics that make basements good for light control — few or no windows, low ambient light from adjacent spaces, no skylights — are exactly what projector image quality requires. For most basement builds, a projector and screen will outperform a TV at equivalent budget points above $2,000.
Projector Advantages in a Basement
• Image size: a 120–135 inch projection screen fills a basement wall at a size no TV currently matches at residential price points. Screen size is the single largest driver of cinema immersion.
• Light control: basements can achieve near-zero ambient light, which is where projector contrast ratios are most impressive. A 4K laser projector in a dark basement room outperforms its lumen spec.
• Ceiling mount: a ceiling-mounted projector keeps the floor and wall clear. In a basement where structural ceiling clearance is already a concern, a compact ceiling-mount projector adds only 6–8 inches to the ceiling-mount bracket plus projector body — less than a standard HVAC duct.
When a TV Makes More Sense
• The basement is a multi-purpose space (exercise, games, kids) and will not always be darkened for viewing — a TV handles variable ambient light better than a standard projector.
• The room is under 12 feet deep — at less than 120 inches of viewing distance, a large TV (85–98 inch) can deliver competitive image quality without requiring a projector throw distance.
• Installation simplicity: a wall-mounted TV requires no ceiling wiring run for a power outlet and HDMI, and no screen installation.
Screen Considerations
In a basement, an ALR (ambient light rejecting) screen is typically unnecessary — standard white screens perform well in low ambient light. A fixed-frame screen is preferred over a motorized screen in a dedicated theater; a motorized screen adds cost without benefit when the room is always used for viewing. Screen gain of 1.0–1.3 is appropriate for basement builds; higher gain screens create hot-spotting visible from off-axis seats.
3. Riser Design for Basement Home Theatres

Basement risers have two requirements that above-grade builds do not: vapour barrier under all wood framing, and ceiling height verification that is specific to the finished floor-to-ceiling dimension of the basement space.
Vapour Barrier Requirement
Place a continuous 6-mil polyethylene vapour barrier directly on the concrete slab before building the riser frame. Lap the barrier 6 inches up the surrounding walls. The bottom plates of the riser frame rest on top of this barrier — not on bare concrete. This single step prevents moisture transfer from the slab into the lumber that causes rot, mold, and structural weakening over 3–10 years of basement occupancy. CMHC's basement renovation guidelines and the National Building Code of Canada both call for this separation between concrete and wood framing.
Ceiling Height Math for Basement Risers
Work through the ceiling clearance calculation before cutting any lumber:
• Unfinished basement ceiling height to lowest beam: measure this precisely.
• Subtract finished ceiling material (drywall and furring): typically 2–3 inches.
• Subtract finished floor material (subfloor + carpet or LVP): typically 1.5–2 inches.
• Remaining headroom = finished floor-to-finished ceiling.
• From this subtract: riser height + seat cushion height (18–20 in) + 48-inch minimum clearance above the seated head.
• If the result is zero or positive, the riser height is feasible. If negative, reduce riser height until the calculation balances.
Example: unfinished height to beam = 96 in. Subtract ceiling (3 in) and floor (2 in) = 91 in finished. With a 10-inch riser: 91 − 10 − 20 − 48 = 13 inches of margin. Feasible. With a 14-inch riser: 91 − 14 − 20 − 48 = 9 inches. Still feasible. With an 18-inch riser: 91 − 18 − 20 − 48 = 5 inches. Marginal — reconsider.
Riser Depth and the Concrete Slab Edge
In a basement, the riser back edge should stop 6 inches from the rear wall to allow ventilation airflow under and behind the platform. Stagnant air trapped between the riser and the wall is a mold-risk zone. If the room's HVAC supply for the theater space is near the floor at the rear wall, design the riser to allow some airflow through the interior cavity — leave gaps in the interior beam framing to allow air movement horizontally through the platform interior.
4. Humidity and HVAC: The Canadian Basement Reality

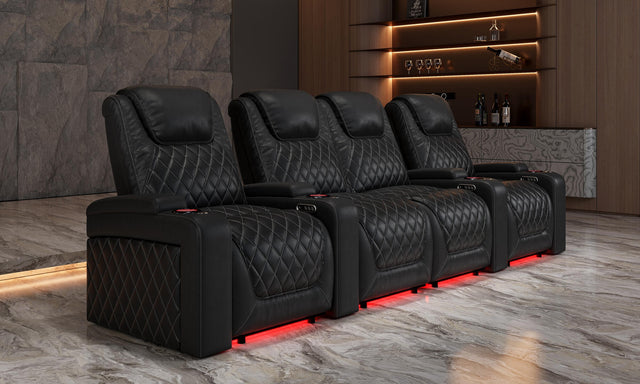
Canadian basements experience the most dramatic seasonal humidity swings of any room in the home. In winter, cold exterior walls draw interior moisture toward the slab; in summer, warm humid air enters a cool basement and condenses on cold surfaces. Unmanaged humidity damages leather and fabric theater seating, warps wood framing, and creates conditions for mold in upholstered furniture.
Target Humidity Ranges for Theater Seating
• Leather seating: 40–55% relative humidity year-round. Below 30%, bonded and genuine leather dries and cracks. Above 65%, moisture promotes mildew on natural leather and delamination on bonded leather.
• Fabric seating: 35–60% relative humidity. Fabric is more tolerant than leather but sustained high humidity causes fabric odor and mold in the seat padding.
• Wood components (riser, millwork): 35–55% for dimensional stability. Wide swings cause expansion and contraction that loosen joints and crack finishes over time.
Province-by-Province Baseline Conditions
• British Columbia (Lower Mainland): marine climate; year-round moderate humidity (55–70% typical). Dehumidification is the primary concern all year, not just summer. A whole-home dehumidifier or a dedicated basement dehumidifier is standard.
• Alberta: semi-arid; basement humidity is naturally lower than most provinces. Winter heating reduces indoor humidity significantly. A humidifier tied to the forced-air system is often needed to keep leather seating in the 40–50% range through December–March.
• Ontario and Quebec: hot, humid summers (65–80% outdoor) and cold, dry winters. The basement requires seasonal management: dehumidification from May through September; humidification supplementation from November through March.
• Atlantic provinces: high year-round humidity similar to BC. Continuous dehumidification is the standard approach; portable units are often insufficient for fully finished basement theater spaces — a whole-basement unit exhausted to the exterior is preferred.
HVAC for the Theater Room
A dedicated return-air register in the theater room allows the central HVAC system to actively manage temperature and humidity in the space. Without a return, the theater room becomes a pressure-isolated zone that cannot be effectively heated, cooled, or dehumidified by the central system. If the basement renovation does not include a return register in the theater room, a supplemental split-system or portable dehumidifier is necessary.
5. Layout Configurations for Basement Rooms

Basement layout planning starts from the structural constraints identified during the measurement phase, then works toward the best possible seating configuration within those fixed limits.
Common Canadian Basement Dimensions
Most Canadian residential basements built between 1980 and 2010 have an open floor plan of approximately 22–28 feet deep by 26–32 feet wide, with 1–3 structural posts in the open span. The theater room is typically partitioned from the mechanical room and utility areas, leaving a finished theater space of 12–18 feet wide by 14–22 feet deep. This size range is well-suited to a 3-seat single-row setup or a 3+3 two-row configuration.
Single-Row Configuration (12–15 ft wide, 14–18 ft deep)
• 3 seats, straight row, front row at 1.0–1.25× screen width from the screen face.
• Side clearances: 18 inches minimum on each side; 24 inches on the side opposite the stairwell entry for easy access.
• If a structural post falls within the room width: position the row so the post is between the second and third seat. Design the seat-to-seat gap at that position to be 12–16 inches (wider than a standard armrest gap) to bracket the column cleanly.
Two-Row Configuration (14–18 ft wide, 20–26 ft deep)
• Front row: 3 seats at 1.0–1.25× screen width.
• Rear row: 3 seats on a riser, center-to-center spacing 54–60 inches from the front row.
• Rear row width: offset 14–16 inches from the front row laterally for sightline staggering. Confirm the total room width accommodates the offset.
• Riser: 8–10 inches, vapour-barrier separated from the slab, with step lighting at the front face.
L-Shaped Basement Rooms
L-shaped basements are common where the stairwell or mechanical room creates a notch in the rectangular floor plan. The theater seating should be placed in the larger rectangular portion of the L. The secondary zone (the shorter leg of the L) can function as a projection equipment alcove, a wet bar, or entry circulation space. Do not try to fit seating into the corner of an L — the irregular walls create awkward clearances and poor viewing angles from the secondary zone.
6. Delivering and Installing Large Seating in a Basement

Large theater seats are assembled from components at the factory and ship in boxes designed for residential delivery. The delivery process to a basement requires planning the path before the delivery date.
Stairwell Dimensions
Measure the stairwell at its narrowest point — this is usually either the width at the top landing (where the wall framing often narrows the opening) or the width at a mid-stair landing if the stairs turn. Standard Canadian residential stairwells are 36 inches wide, which is the minimum that accommodates most theater seat component boxes. Some older homes have 32-inch stairwells — these require careful measurement against your specific product's box dimensions before ordering.
Also measure stair headroom at the lowest point (typically where the floor joists cross over the stairwell). A box that is 48 inches tall must be tilted at a steep angle to clear 80-inch stairwell headroom — possible, but requires two people and a coordinated tilt sequence. Confirm these numbers with the delivery team in advance.
White Glove Delivery
Valencia's white glove delivery service includes carry-in to the room of choice and placement. For basement installations, white glove delivery is strongly recommended over threshold delivery — the delivery team handles the stairwell navigation and assembles the seats in the room. This eliminates the need to organize your own crew for a move that requires two people minimum and significant coordination.
Electrical at the Seat Positions
Theater recliners require a power outlet within 6 feet of each seat position. In a basement, the most common approach is a dedicated circuit run from the electrical panel to a junction box inside the riser, with individual outlets recessed into the riser deck at each seat position. In Canada, in-wall residential wiring uses NMD90 (Loomex) cable. Run 14-2 NMD90 on a dedicated 15-amp circuit. The dedicated circuit prevents the power motors and USB charging from sharing a breaker with the AV rack, projector, or room lighting — all of which draw load on the same circuit during active use.
Assembling Seats in the Room
For multi-seat rows (3+ seats with connected arms and console sections), components are assembled in the room. Clear enough floor space during delivery to lay out all components before assembly begins. Theater seat assembly typically requires 45–90 minutes for a 3-seat row and is accomplished with standard tools (hex keys and a screwdriver). Keep the floor area in front of the final seat position clear — assembling a 3-seat row requires rolling each completed section into position.
Frequently Asked Questions
What ceiling height do I need for a basement home theatre?
The minimum ceiling height for a functional single-row home theatre is 84 inches (7 feet) of finished height. At this height, a standard theater recliner fits comfortably, and you can mount a 100–110 inch screen without the top edge being uncomfortably high. For a two-row setup with a riser, you need 90–96 inches minimum to maintain adequate headroom on the elevated platform. Measure the finished ceiling height — not the unfinished basement height — and account for the combined thickness of the ceiling finish (drywall + furring, typically 2–3 inches) and the floor finish (subfloor + carpet, typically 1.5–2 inches).
How do I control humidity in a basement home theatre?
The target relative humidity for a room with leather or fabric theater seating is 40–55%. In most Canadian provinces, this requires active management year-round. Install a dehumidifier sized for the basement square footage — portable units (30–50 pint/day) work for rooms under 500 sq ft; whole-basement units exhausted to the exterior work better for larger spaces. In Alberta and Saskatchewan, the winter heating season drives basement humidity below 35%, which requires supplemental humidification for leather seating protection. A simple humidity sensor (hygrometer) displayed in the room allows you to monitor conditions without guessing.
Is a projector or TV better for a basement theatre?
A projector is generally the better choice for a dedicated basement theatre. Basements are naturally dark and light-controlled — the ideal environment for projection. A 120-inch projection setup at $2,500–4,000 (projector plus fixed-frame screen) delivers image size that no comparably priced TV can match. The immersive scale of a 120-inch image in a dark basement room is the primary reason most dedicated home theatres use projection. A TV makes more sense when the space doubles as a general family room and ambient light is not consistently controlled, or when the room depth is less than 12 feet.
Do I need a vapour barrier under a basement theater riser?
Yes — always. Concrete slabs transmit moisture upward, and any wood structure (including the riser frame) placed directly on concrete will absorb that moisture over time. In Canadian climates, the seasonal freeze-thaw cycle pushes additional moisture through slab and foundation walls throughout the year. A 6-mil polyethylene vapour barrier placed continuously under the riser's bottom plates before construction is the correct approach. This requirement is not optional — it is called for by both CMHC's renovation guidelines and the National Building Code of Canada for any wood framing in contact with concrete.
How do I deal with a support post in the middle of my basement theater?
Map the post location precisely on your floor plan before designing the seating layout. If the post falls between two planned seat positions, widen the gap between those two seats to 12–16 inches (instead of a standard 6–8 inch armrest gap) to bracket the post with clearance on both sides. This gap can incorporate a storage console or center table if the space between seats is large enough. If the post falls directly where a seat must go, shift the entire row laterally until the post is between seats rather than at a seat position. Posts are structural — designing around them is the correct approach; removal requires a structural engineer and significant cost.
Will my stairwell fit home theater seating?
Most residential theater seats ship as disassembled components in boxes that are 30–36 inches wide. A standard Canadian residential stairwell at 36 inches wide can accommodate these boxes. Measure your stairwell at the narrowest point — often the top landing or any mid-stair turn — and compare against the product's specific box dimensions. Also measure stair headroom at the lowest point (where the floor joists cross over the stairs) to verify that tall boxes can be tilted through. Valencia's white glove delivery team handles basement installations regularly and can advise on stairwell requirements for specific products before your delivery date.
Can I put home theater seating on heated floors in a basement?
Theater seats can sit on in-floor heated floors without damage. The seated weight of a theater recliner (seat + occupant: typically 400–600 lbs combined) is within the load tolerance of all residential in-floor heating systems. One consideration: if the seats are placed on carpet over in-floor heating, the carpet and padding act as insulation and reduce the heating efficiency in the covered zones. This is typically not a functional problem — it means the heating system runs slightly longer to reach the set temperature — but it should be factored into thermostat setpoints. Place the seat feet on protective furniture pads to prevent any local point pressure on the heating element layer beneath the flooring.
What size screen works best in a Canadian basement?
For a typical finished Canadian basement theater room (14–18 ft deep, 12–16 ft wide), a 110–120 inch projection screen is the practical sweet spot. At 14 feet of viewing distance, a 110-inch screen delivers a 1.0× screen-width viewing angle — the standard for cinema immersion. A 120-inch screen at the same distance brings you to approximately 1.1× screen width. Screens larger than 120 inches require either a longer throw projector or a short-throw projector with a very large wall. Most basement builds top out at 120 inches comfortably; 135 inches is achievable in rooms 16+ feet deep. Screen height must fit within the wall between the ceiling and any baseboard HVAC vents — measure the available wall height before purchasing a fixed-frame screen.


